To get your sensors up and running, you'll have to learn how to upload the Arduino embedded software [called sketches] to the microcontroller. The team behind Arduino has already created a so-called IDE [Integrated Development Editor] that is really simple to use for sketch development and board uploads.
Installing the development environment on your computer
The team behind Arduino have written a pretty good guide on how to install the IDE so just follow the instructions for your platform [and don't forget to come back here after].
Here is a small clip [for the youtube-generation] showing how to get started with the Arduino environment.
Installing the sensor libraries
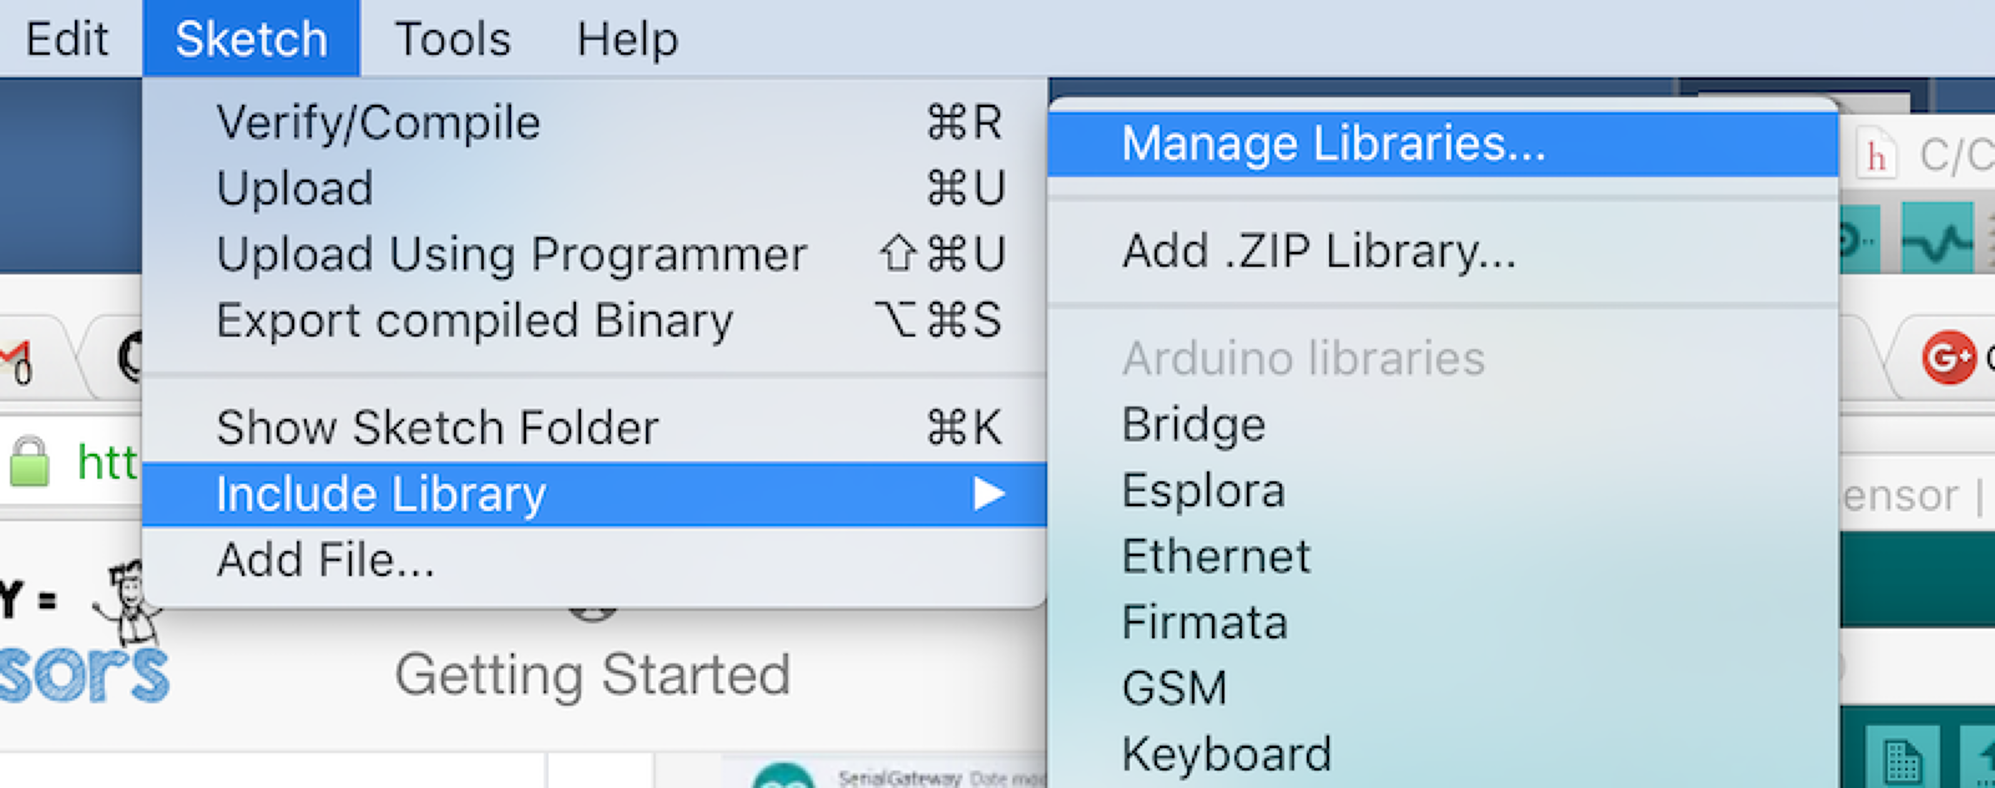
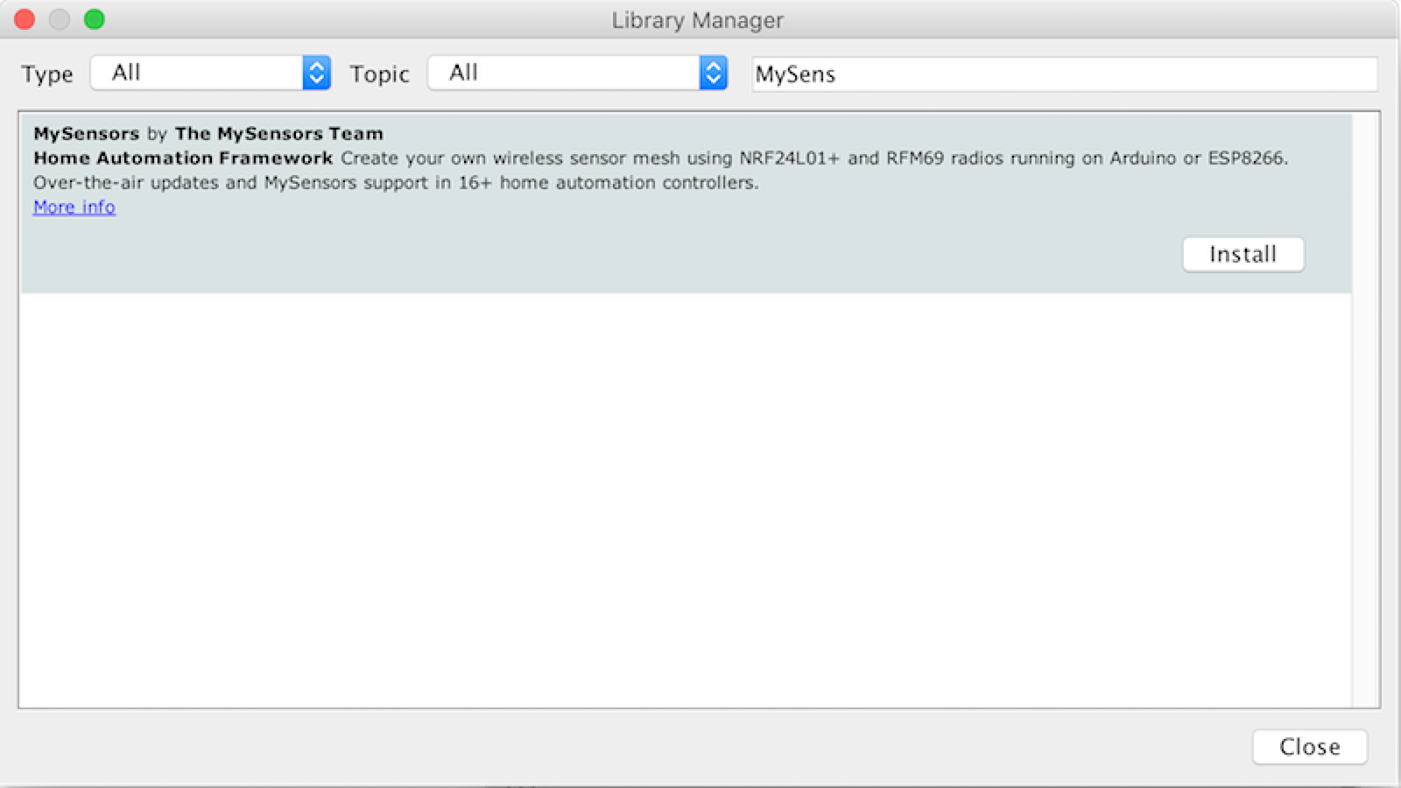
The MySensors library is available in the IDEs Library Manager ![]() . See the following screenshots on how to download and install it.
. See the following screenshots on how to download and install it.
Optional - install external MySensors examples
Some of the MySensors examples require third party libraries. To avoid conflicts, those examples are not included by default. Installing them requires a bit more skill than just using the regular MySensors examples so we strongly suggest you wait installing the external examples until you have gotten your first nodes working.
Adding the official MySensors HW to the Arduino board manager
This is described here.
Connecting the Arduino to your computer
Both the Arduino Uno and Nano have built in USB connectors. If everything is setup correctly you should be able simply connect them to your computer using a standard USB cable and select the serial connection under the Tools>Port menu in the Arduino IDE.
The Arduino Pro Mini does not include a built-in USB circuit, so an off-board USB-to-TTL serial converter must be used to upload the software sketches to your Arduino.
The FTDI adapter we've added to the store is configurable for both 5V and 3.3V output mode. It's important to select the correct voltage when connecting a 3.3V Arduino Pro Mini.
Uploading example sketches
You'll find download links directly on each of the example sensor build pages. We've also bundled examples with the library so you can find them in:
Press the compile button to generate a binary executable for the Arduino. If you press upload button the binary sketch will be sent to your Arduino through the connected USB-cable. The Arduino will automatically restart itself after the binary sketch upload completes.
If any errors occur they will be displayed in the console at the bottom of the screen.
Basic structure of sketches
Arduino sketches must contain two main functions - setup() and loop(). Setup() will be called whenever the Arduino is powered cycled or reset. Loop() will be called continuously.
A general rule is to place all initialization logic in the setup() function and the normal "work" in the loop() function.
// Include your libraries at the top
#include <SPI.h>

void before()
{
    // Optional method - for initialisations that needs to take place before MySensors transport has been setup (eg: SPI devices).
}

void setup()
{
    // Called once at startup, usually used to initialize sensors.
}

void presentation()
{
  sendSketchInfo("Name of my sensor node", "1.0");
  present(CHILD_ID, S_WHATEVER);
}

void loop()
{
    // This will be called continuously after setup.
}
A few general tips
- If you're new to Arduino programming, https://www.arduino.cc/en/Reference/HomePage is a great resource to learn about the programming language.
- Use the serial monitor to see what is going on in the sensor. We're outputting debug information that can help you find potential problems. You can enable it under Tools>Serial Monitor.
- Remember to set the correct board type before uploading your sketch. You'll find the list under the Tools>Board menu item. We're usually using one of the following 3 types in our examples: Arduino Uno Arduino Nano Arduino Pro or Pro Mini If sketch upload fails, check that the correct serial port is selected under the Tools>Serial Port menu item. When using a Pro Mini, you must upload the sketch binaries using an FTDI serial adapter. Double check that you have selected the correct output power using the jumper on the adapter! If you accidentally feed 5V to a 3.3V Arduino board it will probably break.