 The **Vera Home Automation Controller** is a commercial controller running on its own hardware. It has a rather open plugin architecture and we use it as a testing ground for new controller features. The controller has a history of controlling Z-Wave devices.
MySensors is supported through the Serial Gateway and Ethernet Gateway.
We keep all the Vera plugin installation instructions on this page.
Features
- Manages about 70-200 Z-Wave devices (depending on model)
- Lots of free 3rd party plugins on their plugin market
- Free cloud service with backups and remote access
- Build in web-browser GUI and 3rd party apps supporting remote access
Installing the Vera Plugin
Once you have installed the Arduino Plugin, you will register your sensors with the Vera by using the Inclusion mode triggered by clicking on the Start button on the plugin. The default inclusion duration is one minute.
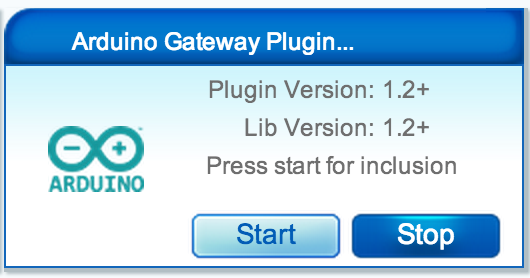
When a sensor sends its presentation during inclusion mode, the Vera will add it as a new device on the Vera dashboard. Sensors send their presentation information from the setup() method whenever the sensor node's Arduino is reset or power-cycled so you will need to reset your sensor node once you have click the Start button.
The Vera plug-in is compatible with both the Vera 3 and Vera Lite models running UI5 and supports both the Serial and Ethernet Gateways. All you have to do, is configure the Vera plug-in and build either a Serial or Ethernet gateway using the instructions below.
- First, download the latest Vera plugin files from the MySensors Git Repo for UI5 or Git Repo for UI7

Then upload the files to your Vera.
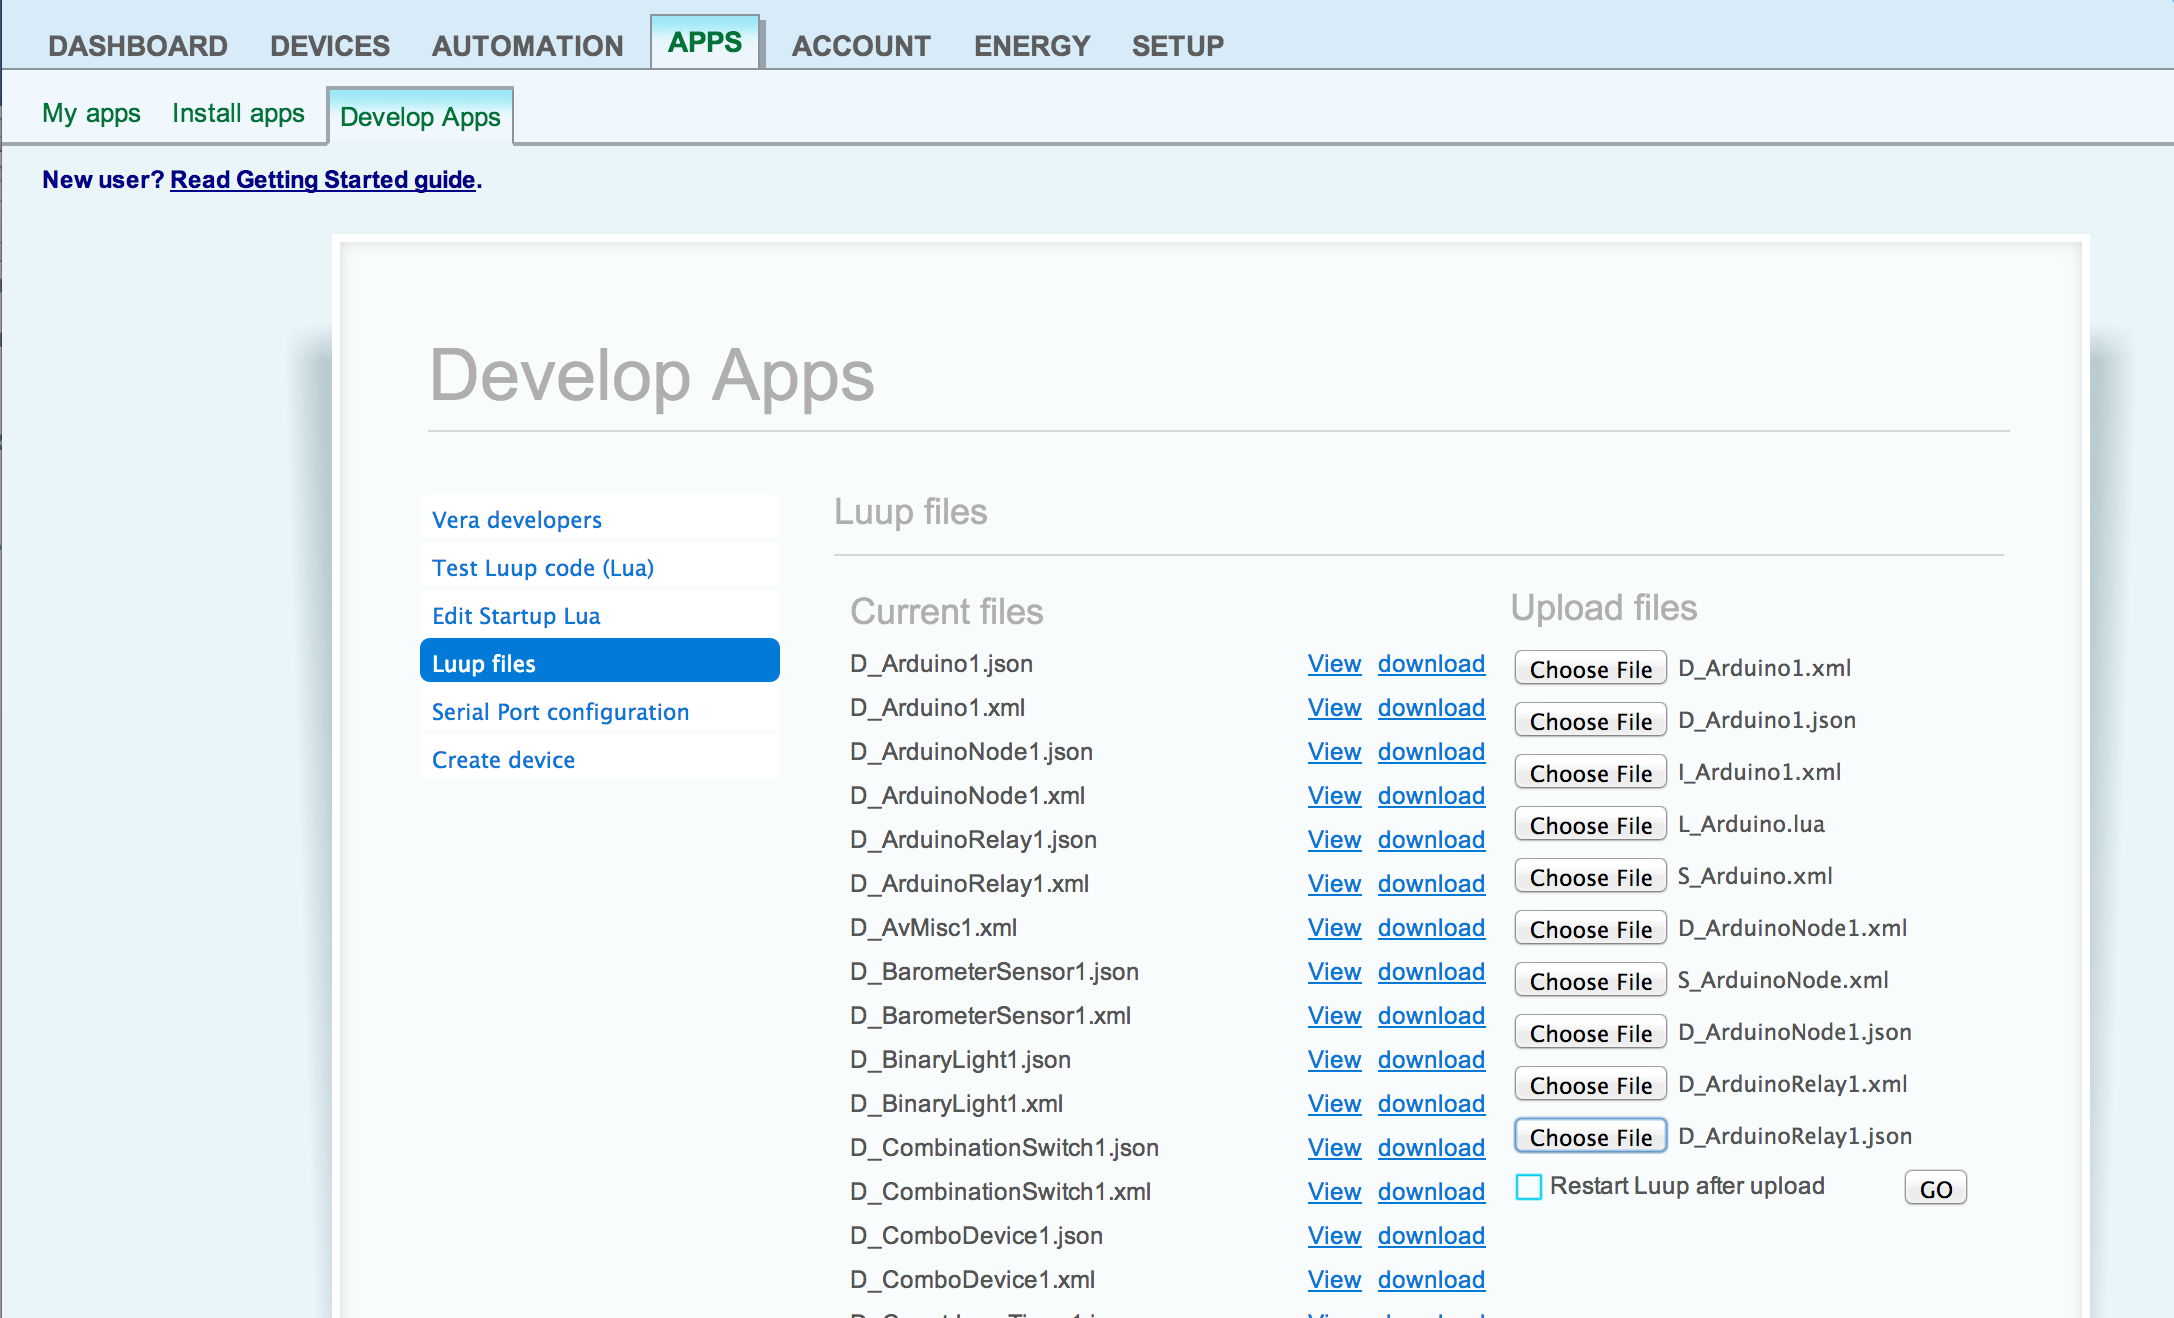
Go to: APPS Develop Apps Luup files.
Select "Choose File" for each device file and then press the "GO" button to upload the files to your Vera.
Finally, create the Arduino Device.
Go to: APPS Develop Apps Create Device.
Enter "D_Arduino1.xml" for the "Upnp Device Filename" and press the "Create Device" button.
Click the Reload button in the upper right corner of the Vera dashboard to create the Arduino root plugin device. It may take a few minutes for the reload to complete and display the Arduino root plugin device on the dashboard.
Device specific settings and files
Some of the sensors requires extra device files and configuration. Make sure to look here if your sensor don't show up correctly on Vera.
Upload the device files the same way as you did above with the plugin files.
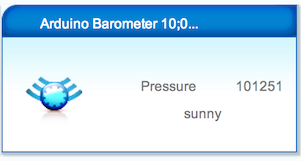
Barometer (pressure sensor)
GitHub | D_BarometerSensor1.json
GitHub | D_BarometerSensor1.xml
GitHub | S_BarometerSensor1.xml
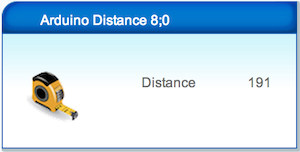
Distance Sensor
GitHub | D_DistanceSensor1.json
GitHub | D_DistanceSensor1.xml
GitHub | S_DistanceSensor1.xml
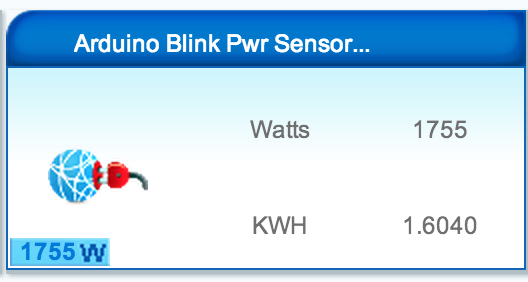 #### Energy Meter (pulse)
TIP: Perform the following steps if you want the vera device to display the correct KWh for your meter.
- Include your new power meter sensor on Vera.
- Turn off the sensor.
- Update the Variable1 value under the new Vera devices advanced tab. Set Variable1 to your meter's current KWh value multiplied by your PULSE_FACTOR and save the Vera changes.
- Now turn on your power sensor. During startup, the sensor will fetch the current KWh from the Vera.
Example: If your pulse factor is 1000 and your meter's current KWh reading is 33211, set Variable1 to 33211000.
Rain Gauge
GitHub | D_RainSensor1.json
GitHub | D_RainSensor1.xml
GitHub | S_RainSensor1.xml
Scale Sensor (weight)
GitHub | D_ScaleSensor1.json
GitHub | D_ScaleSensor1.xml
GitHub | S_ScaleSensor1.xml
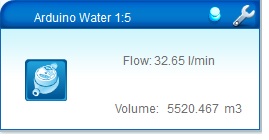 #### Water meter (pulse)
GitHub | D_WaterMeter1.json
GitHub | D_WaterMeter1.xml
GitHub | S_WaterMeter1.xml
TIP: Perform the following steps if you want the vera device to display the correct total water volume for your meter.
- Include your new water meter sensor on Vera.
- Turn off the sensor.
- Update the Variable1 value under the new Vera devices advanced tab. Set Variable1 to your meter's current total volume value multiplied by your PULSE_FACTOR and save the Vera changes.
- Now turn on your water meter sensor. The sensor will fetch the current volume from Vera.
Example: If your pulse factor is 100 and the current volume-reading on your meter is is 332. Set Variable1 to 33200.
Including New Sensor(s)
To add one or more new sensors to your Vera, follow the steps below:
- Start inclusion mode on the Arduino Vera device by pressing the "Start" button. Inclusion mode is normally active for 1 minute.
- While the inclusion mode is active, restart each new sensor that you want to include to ensure that it sends the special presentation message to the Vera. Once the inclusion mode ends, you should see something like "2 new sensors found" in the Arduino Vera device.
- Once inclusion mode ends, your Vera will automatically reload the luup engine if it detected any new sensor nodes. Once the Vera reload completes (1-3 minutes), you should see your new Arduino sensor devices on the dashboard.
- Restart you sensor again. This create all necessary variables for the new device and will update the sketch name and version information for the sensor node.
- Finally, reload the browser tab. Congratulations! Your new Arduino sensor devices should be on-line, connected and reporting data to your Vera!
Configuring the Vera Plugin for the Serial/USB gateway
NOTE: You must use an Arduino Nano for the USB version of the gateway. The Nano is the officially supported and tested model so if you try a different version, we cannot guarantee that the Vera will recognize it.
Follow the instructions on how to build the serial gateway.
Connect the gateway Arduino to one of your Vera USB ports using a standard USB cable. If all of the Vera USB ports are in use, then you can plug in the gateway into a USB hub that is connected to one of the Vera USB ports.
 Next, you will need to configure the USB port communication settings so the Vera can communicate with the gateway over the USB serial connection.
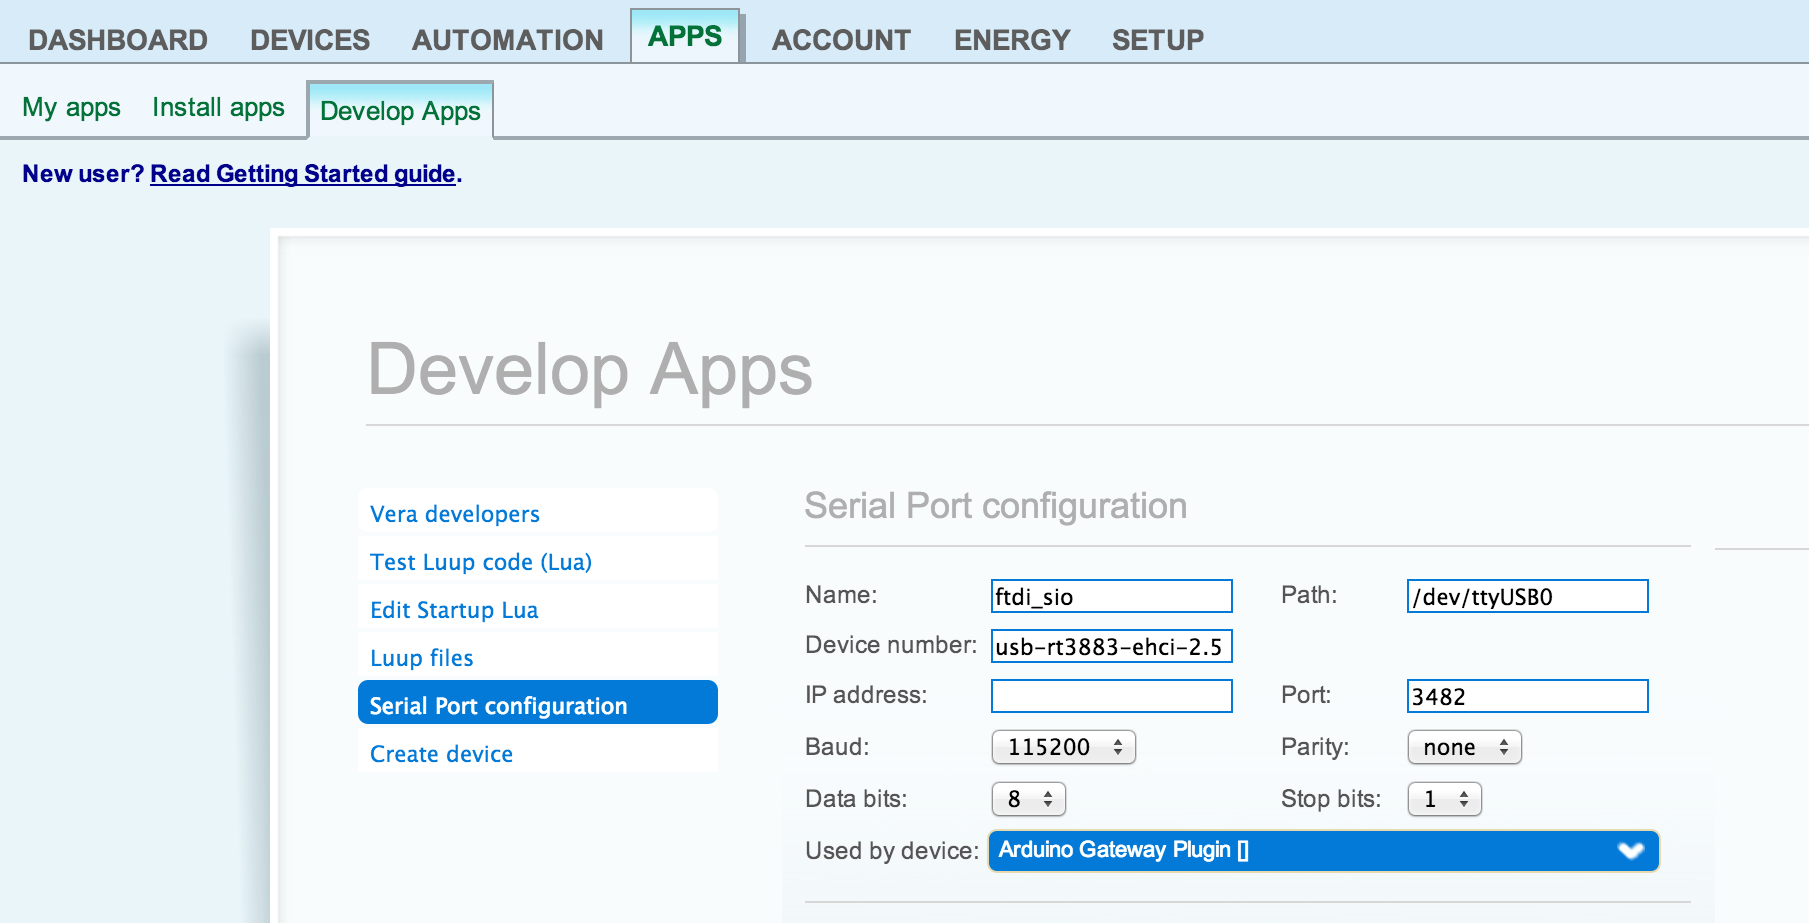
Finally, go to: APPS Develop Apps Serial port configuration. See the screenshot to the right.
- For the Used by device: setting, select the Arduino Gateway Plugin [] from the menu of available devices.
- Set baud rate to 115200.
- Set the parity to none with 8 data bits and 1 stop bit.

TIP: How to fix a serial communication failure
Sometimes the Vera will have trouble connecting to a properly configured USB serial device, particularly after loosing power. Use the following steps to re-establish serial communication with the gateway:
- Unplug the MySensors gateway from the Vera USB port
- Restart the Vera LUUP Engine (Settings->Z-Wave Settings->Advanced->Reload Engine)
- Plug gateway into the Vera USB port
- Restart the Vera LUUP Engine (Settings->Z-Wave Settings->Advanced->Reload Engine)
- Re-configure serial port as described above (typically, you only need to reset the baud rate to 115200)
Configure the Vera Plugin for the Ethernet gateway
Open configuration for the Arduino Device and select the Advanced tab.
Enter the ip-number:port in the ip field. This will override any previous serial configuration in the Vera plugin; If you chose to use the default IP address and port defined in the EthernetGateway sketch, enter: 192.168.178.66:5003